



Hop.Earth proved you can drive any real road on the planet inside a browser tab — and then the developer open-sourced enough of the stack that you can see exactly how. explainx.ai covered Hop.Earth when it went viral in early August 2026: a real-time world generator that pulls road geometry from OpenStreetMap and elevation from satellite data, so the drivable surface is, in principle, the entire planet's mapped road network. This guide is the build-along — the actual architecture behind a game like that, step by step, plus how to fill it with vehicles, props, and sound using AI instead of a 3D art team.
TL;DR — what you're actually building
| Question | Direct answer |
|---|---|
| What's the reference architecture? | Web auth + Socket.IO game server + road tile service + elevation tile service + browser client — github.com/DVLPLONDON/Hop ships a runnable slice of exactly this |
| Where does the road data come from? | OpenStreetMap, via the Overpass API or pre-extracted regional extracts |
| Where does terrain height come from? | Satellite-derived elevation datasets — Hop.Earth's production build references Copernicus DEM, IGN, and CNIG sources; the public repo ships a simplified version for local development |
| How do I make vehicles, props, and buildings without modeling them by hand? | Generate them with an AI 3D asset tool — this guide uses bunpav, text-to-3D or image-to-3D, exported as GLB |
| What renders the world? | A WebGL/Three.js browser client — Hop's public client is a lightweight reference, not a full renderer |
| How does multiplayer work? | Socket.IO game server, running on a separate port from the tile services |
| What's the fastest path to something playable? | A chat-driven AI game generator (like bunpav's Game Forge) for a rough prototype, then graduate to the full custom stack below |
| What will this cost me? | $0 for the OSM/elevation data (open), a few dollars in AI credits for a first asset pass, your own compute/hosting for the tile and game servers |
Step 0: Decide what "Hop.Earth-style" means for your project
Before writing code, pick a scope. "Drive any road on Earth" is Hop.Earth's finished pitch, not week one of a build. The architecture scales down cleanly:
- Fixed region prototype — pick one city or district, pre-fetch its OSM road data once, and skip the live tile-serving layer entirely. This is the fastest way to validate whether your driving mechanic and rendering pipeline are actually fun.
- On-demand regional tiles — serve road and elevation tiles for a bounded area (a country, a metro region) from your own tile services, generated on request and cached.
- Planet-scale, real-time generation — Hop.Earth's actual pitch: any road, anywhere, generated as the player moves, with no region packs to download.
Most solo developers and small teams should build option 1 first, prove the core loop, and only invest in option 2 or 3 once driving actually feels good. The rest of this guide covers the full pipeline, but treat steps 3–4 (the tile services) as the part you can stub out or fake until later.
Step 1: Study the reference architecture
Hop.Earth's developer published a genuinely runnable slice of the production stack at github.com/DVLPLONDON/Hop — not a marketing repo, an actual cd backend && npm install && npm start project. Reading it before writing your own code saves you from re-deriving decisions the original build already made. The layout:
backend/
├── public/            # browser client + sample map tiles
├── src/
│   ├── web/            # auth + portal
│   ├── game/            # multiplayer game server (Socket.IO)
│   ├── tiles/            # road tile service
│   └── elsrv/            # elevation tile service
game/                    # separate client directory
├── index.html
├── front.js
├── bundle.js
└── assets/
Running it locally starts four separate concerns on four separate ports: the browser client at http://localhost:9000, the game server on 3001, road tiles on 3456, and elevation tiles on 3457. That port split is the single most useful architectural decision to copy directly — it keeps the parts that scale differently (a stateful multiplayer game server vs. stateless, cacheable tile requests) as separate services from day one, instead of one monolith you have to split apart later.
The public build's elevation data is intentionally simplified for local development. Hop.Earth's production system draws on processed digital elevation model (DEM) sources — Copernicus DEM, France's IGN, and Spain's CNIG are the ones referenced — which is worth knowing going in: the "any road, anywhere" claim only holds as evenly as the underlying open data does. Densely mapped regions (Western Europe, North America, major metro areas) will look and drive better than sparsely mapped ones, because OSM coverage and DEM resolution both vary by region.
Step 2: Get real road data from OpenStreetMap
OpenStreetMap is the correct data source for this project for a structural reason, not just a cost one: its road geometry, connectivity, and metadata are licensed for exactly this kind of derivative, redistributable reuse, in a way most commercial map providers aren't. Two practical ways to pull it:
For a fixed-region prototype (recommended to start):
# Overpass API — pull all drivable ways in a bounding box
curl -X POST https://overpass-api.de/api/interpreter \
  -d 'data=[out:json];way["highway"](51.49,-0.14,51.51,-0.10);out geom;'
That returns every tagged road segment in the box as GeoJSON-adjacent data — intersections, one-ways, road class (highway=primary, residential, motorway, etc.) all included. For a first prototype, dump the result to a static file and load it directly in your client; you don't need a live tile service yet.
For on-demand regional tiles (Hop's actual pattern): the src/tiles service in the reference repo wraps this same kind of query behind a tile-indexed HTTP endpoint, so the client requests /tiles/{z}/{x}/{y} the way a normal map tile server works, and the service resolves that to an OSM query (or a cached result) for that tile's bounding box. This is the piece to build once fixed-region loading feels too limiting.
Either way, road class matters for gameplay, not just geometry — a motorway segment should probably allow higher speeds and wider lanes than a residential one, and OSM's highway tag gives you that distinction for free if you preserve it through your pipeline instead of discarding it after the geometry extraction.
Step 3: Turn elevation data into drivable terrain
Flat roads are fine for a tech demo; they stop feeling real fast. Elevation is what separates "roads drawn on a plane" from "roads that actually climb a hill." The pattern:
- Pull elevation samples for your region from an open DEM source — Copernicus DEM (global, ~30m resolution, free) is the most accessible starting point; national sources like IGN or CNIG give higher resolution if your region is covered.
- Sample elevation at intervals along each road segment (not just at intersections) so the road surface actually follows the terrain instead of interpolating flat between two distant points.
- Generate a heightmap or mesh for the terrain surrounding the road from the same DEM tile, so the road doesn't float above or clip through the ground it's sitting on.
This is the src/elsrv service in the reference repo — a dedicated microservice, separate from road tiles, because elevation queries have a different access pattern (spatial raster lookups) than road queries (vector geometry). Keeping them as separate services, each independently cacheable, is worth preserving even in a smaller build.
Step 4: Build the multiplayer game server
Hop.Earth uses Socket.IO for its game server, which is the pragmatic default for this kind of project: you need low-latency position/state broadcast between players sharing a road network, but you don't need the raw performance ceiling of a custom UDP protocol for a game where players are, at most, occasionally in close proximity on the same stretch of road. A minimal version:
import { Server } from "socket.io";

const io = new Server(3001, { cors: { origin: "*" } });

io.on("connection", (socket) => {
  socket.on("position", (state) => {
    // broadcast this player's position/heading/speed to everyone
    // currently loaded into the same road tile or race instance
    socket.broadcast.emit("player:update", { id: socket.id, ...state });
  });

  socket.on("disconnect", () => {
    io.emit("player:leave", { id: socket.id });
  });
});
The real engineering problem here isn't the socket wiring — it's interest management: on a planet-scale road network, you never want to broadcast every player's position to every other player globally. Group connections by loaded tile or by an explicit race/session ID (the way Hop.Earth's shareable custom races imply it does), and only broadcast within that group.
Step 5: Render the world in the browser
The client's job is to take road geometry + elevation + your generated assets and turn them into a drivable 3D scene. Three.js (or Babylon.js, if you prefer) is the standard choice for a browser-based build like this — explainx.ai has covered several procedurally generated Three.js/Babylon.js worlds recently that use the same fundamental loop:
- Build road meshes from the OSM geometry — extrude each way's line geometry into a flat ribbon at the correct width for its
highwayclass, then displace vertices by sampled elevation. - Build or load terrain meshes for the area around the road from your heightmap data.
- Place generated assets — vehicles, buildings, trees, signage — at positions derived from OSM tags (
building=yesfootprints,natural=treepoints) or scattered procedurally where OSM has no relevant tag. - Drive physics — a simple raycast-to-ground-plus-steering model is enough to start; you don't need a full rigid-body simulation to make driving feel responsive.
- Camera — a chase camera following the vehicle, with elevation-aware collision so it doesn't clip through hills.
This is also the stage where the honest caveat from Hop.Earth's own coverage applies directly to your build too: road layout and elevation can be genuinely accurate, while everything else — buildings, scenery, texture detail — is a generated or simplified approximation, not a photorealistic reconstruction of the real location. Set that expectation for players early; it's the difference between "impressive tech demo" and "why doesn't this look like Street View" disappointment.
Step 6: Generate every asset with AI instead of modeling it by hand
This is the step that used to require either a 3D artist on retainer or weeks in Blender — and it's the one AI tooling has changed the most. For a driving game specifically, you need several asset categories, and each one maps to a specific bunpav tool:
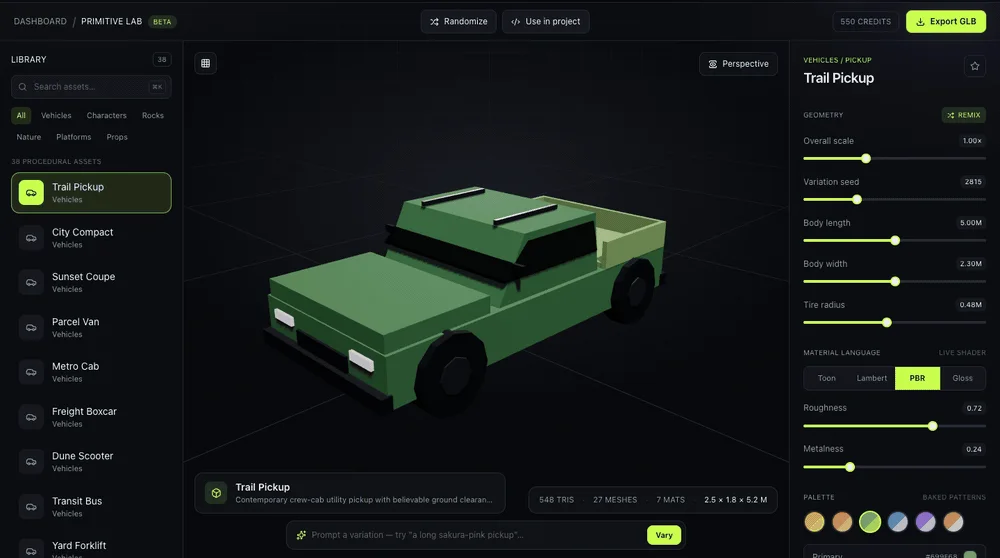 bunpav's Primitive Lab procedural 3D asset editor showing a low-poly vehicle with live parametric geometry sliders for scale, wheel radius, and body proportions
Vehicles and props — Primitive Lab (procedural, parametric). Instead of sculpting a car from scratch, Primitive Lab gives you live sliders — body length, width, height, wheel radius, tire width — and rebuilds the mesh in real time as you drag them. For a driving game, this is the fastest path to a family of vehicles that all share a consistent art style, because you're varying parameters on the same underlying generator rather than hand-authoring each one independently. Flip between material modes and curated color palettes, then export straight to GLB.
One-off hero assets — text-to-3D and image-to-3D. For anything Primitive Lab's parametric templates don't cover — a specific landmark building, a unique prop — describe it in plain English and get back a textured, game-ready mesh, or photograph a real object and reconstruct it as a 3D model with UVs and texture already applied. Both export to GLB, FBX, OBJ, USDZ, and STL, so GLB drops straight into a Three.js scene with no format conversion step.
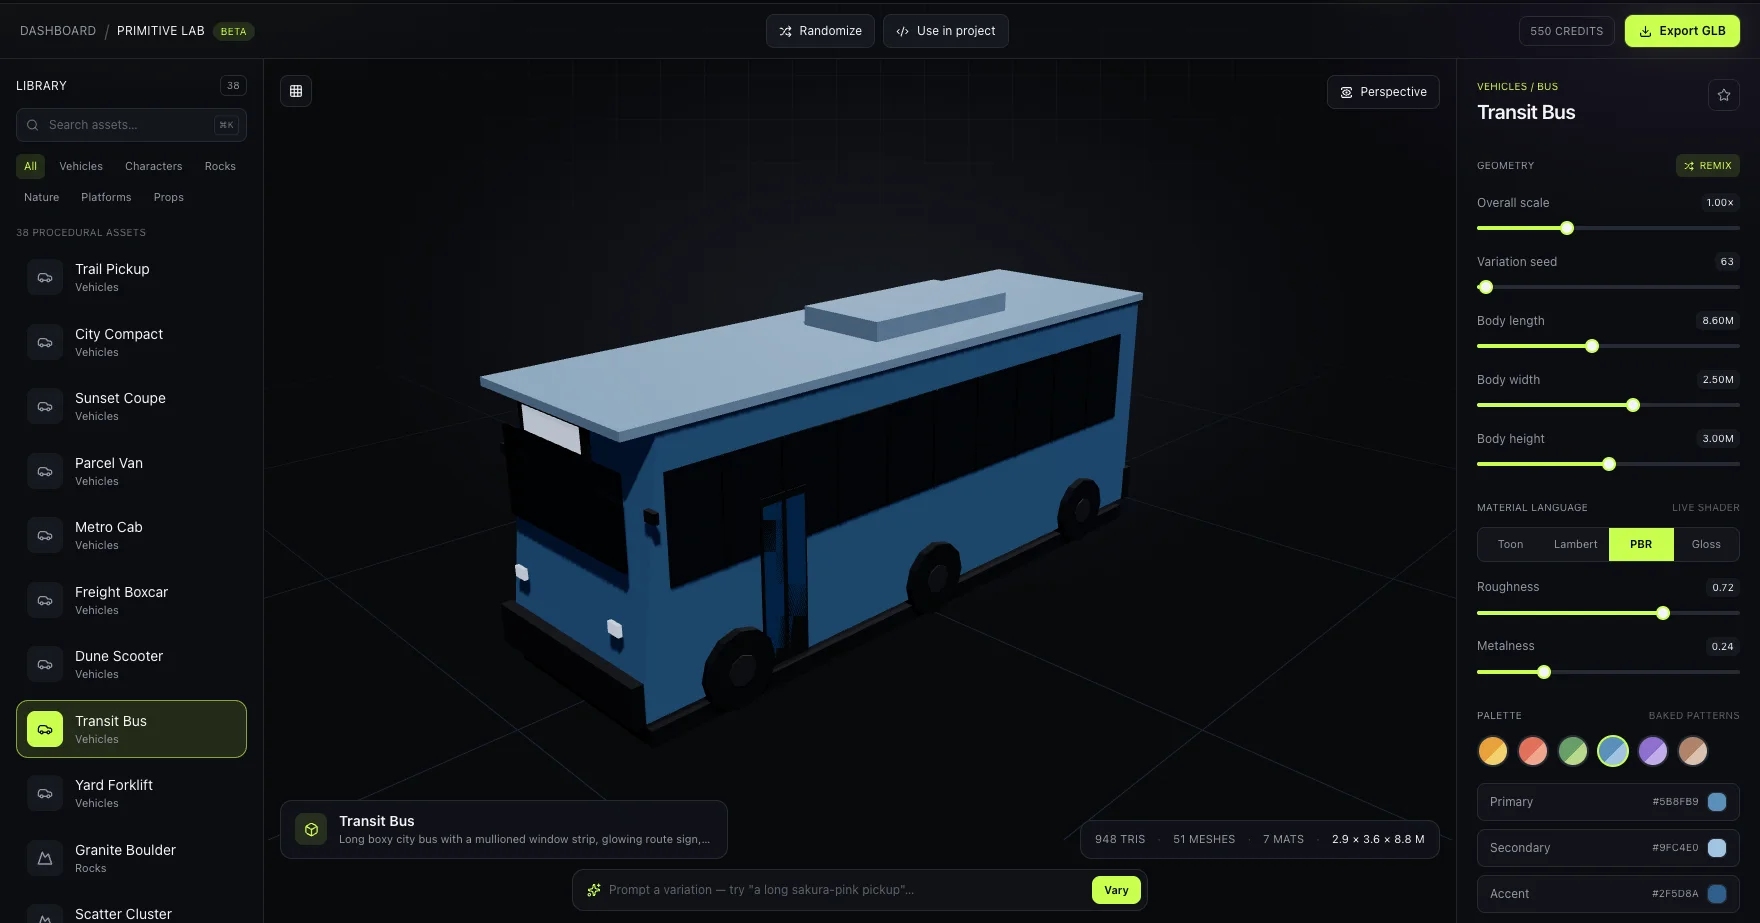 A generated low-poly transit bus 3D asset in bunpav's studio, shown with material and color palette controls for a driving-game-ready vehicle
Pedestrians, other drivers, NPCs — auto-rigged characters. If your driving game has characters at all — pedestrians crossing a street, other named drivers, a passenger — bunpav generates the character and rigs it with a humanoid skeleton in the same pass, so it's ready to pose or animate in Unity, Unreal, or Blender without a separate rigging step.
Engine sound, ambience, UI stingers — Audio Lab. A driving game without engine notes, tire screech, and ambient road noise feels dead no matter how good the visuals are. Generate SFX, ambience, and short seamless loops from a text description, preview them in-browser, and download as MP3 for direct use in your build.
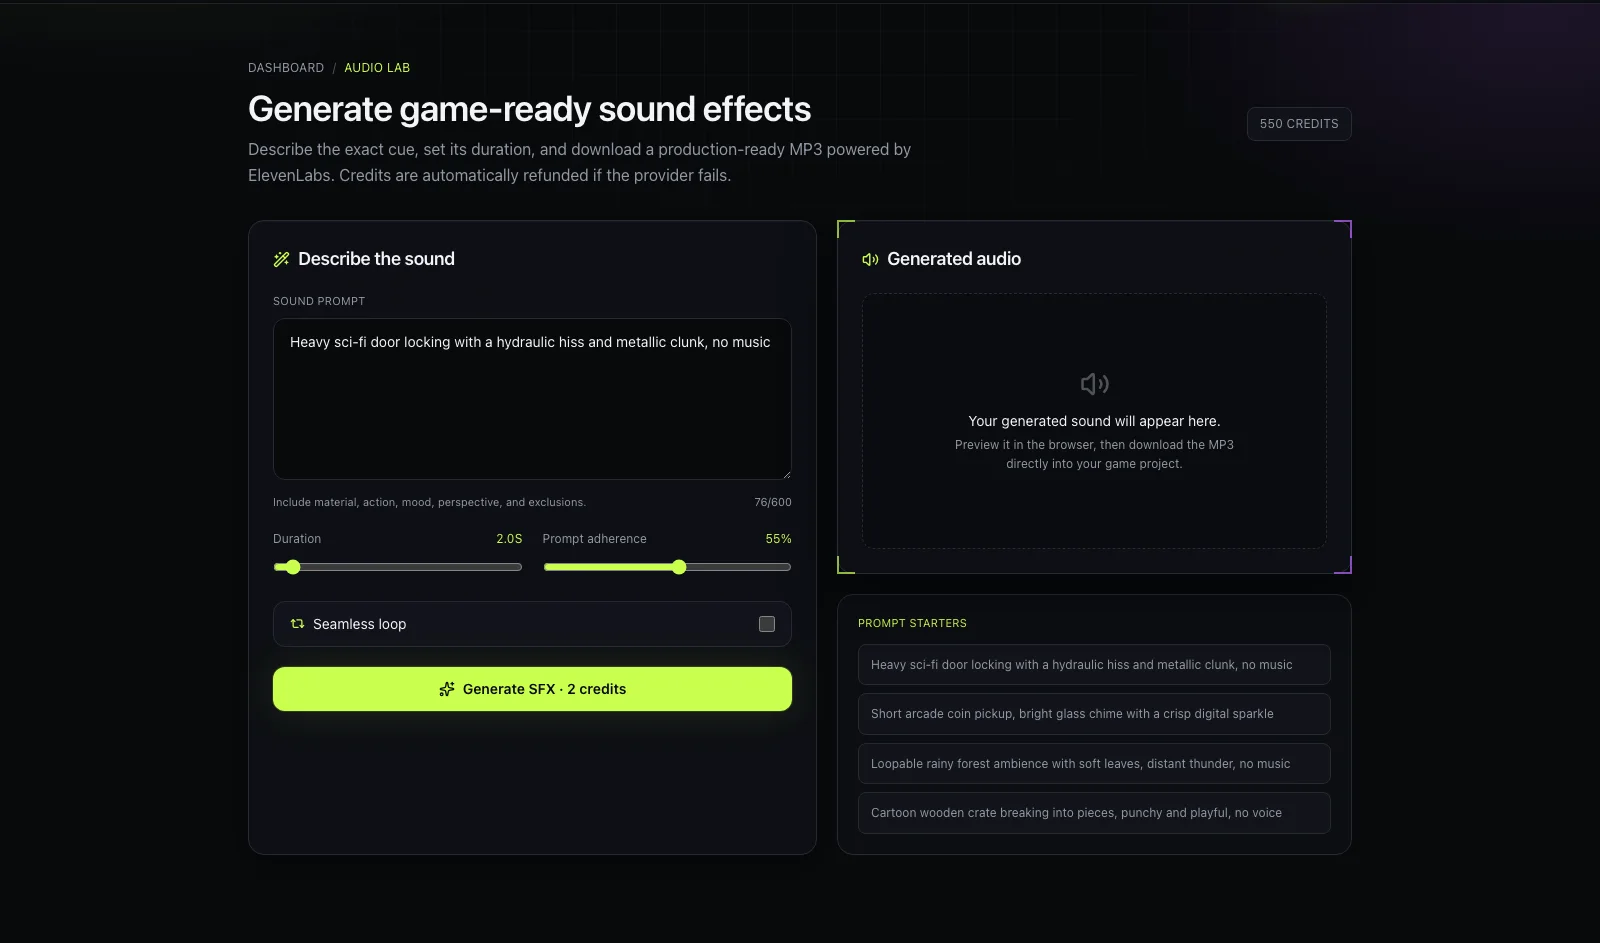 bunpav's Audio Lab workspace for generating game sound effects, ambience, and music loops from a text prompt
HUD icons and minimap markers — 2D sprite sheet generator. Once you have individual icon frames (speedometer needle states, minimap pins, race-position numerals), pack them into an engine-ready sprite sheet with uniform grids, padding, and a JSON atlas — free, browser-based, no separate tool needed.
A realistic first asset pass for a small test region — a handful of vehicle variants, a dozen building/prop types, a pedestrian or two, and 8–10 sound effects — costs a few dollars in credits on a free-to-start account (25 welcome credits, then packs from $9 for 100 credits), not the multi-week, multi-thousand-dollar contractor engagement the same asset list would traditionally require.
Step 7 (the fast path): Skip the custom stack and vibe-code a prototype first
If steps 1–6 sound like a lot before you know whether the core mechanic is even fun, it's because it is — and there's a genuinely faster path for validating the idea before committing to the full architecture. bunpav's Game Forge is a chat-driven browser game generator: describe the game — genre, controls, mood, pacing — and get back a self-contained, playable build with no engine install and no build step.
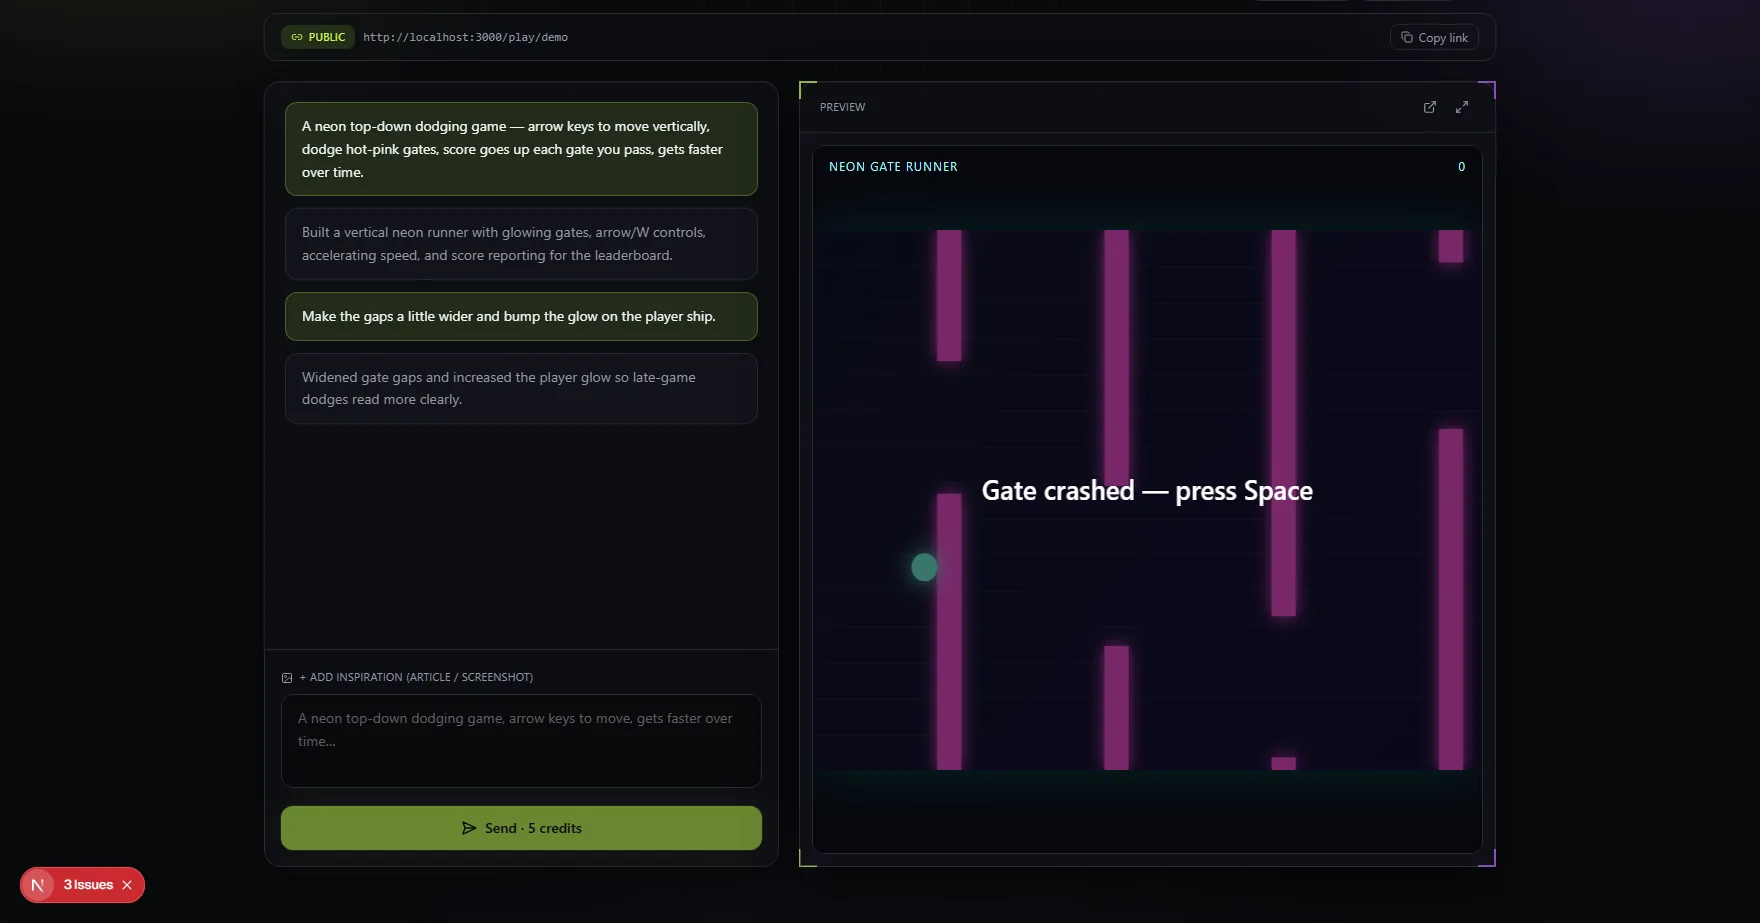 bunpav's Game Forge chat-driven browser game generator, showing a chat panel on the left and a live playable preview on the right
The workflow:
- Open Game Forge, name a project, and describe what you want — "a top-down driving game on a procedurally curving road, drift-based scoring, arcade physics" is a reasonable starting prompt.
- Each send (5 credits) returns a playable build in a live, sandboxed iframe preview — no separate deploy step.
- Follow-up chat messages patch the existing game in place rather than starting over, so you can iterate on feel — "widen the road," "add a jump ramp," "make the car handle looser" — the same way you'd direct a collaborator.
- Flip the project public to get a shareable
/playlink with a lightweight leaderboard, so you can playtest with friends before you've written a line of the production stack.
This isn't a replacement for the custom-built road-and-elevation pipeline if your actual goal is a Hop.Earth-scale real-world driving game — Game Forge produces bespoke, self-contained prototypes, not a system wired to live OSM data. But as a way to nail down "is a driving game with this camera angle and this physics feel actually fun to play," it's dramatically faster than standing up the full tile-service architecture first and finding out the mechanic doesn't work.
For a more deterministic, template-based alternative — fixed level structure with tunable difficulty, enemy density, and world-size sliders instead of open-ended chat generation — bunpav's separate Game Lab (procedural game generator) is worth comparing; it trades bespoke mechanics for reproducible, seed-based output.
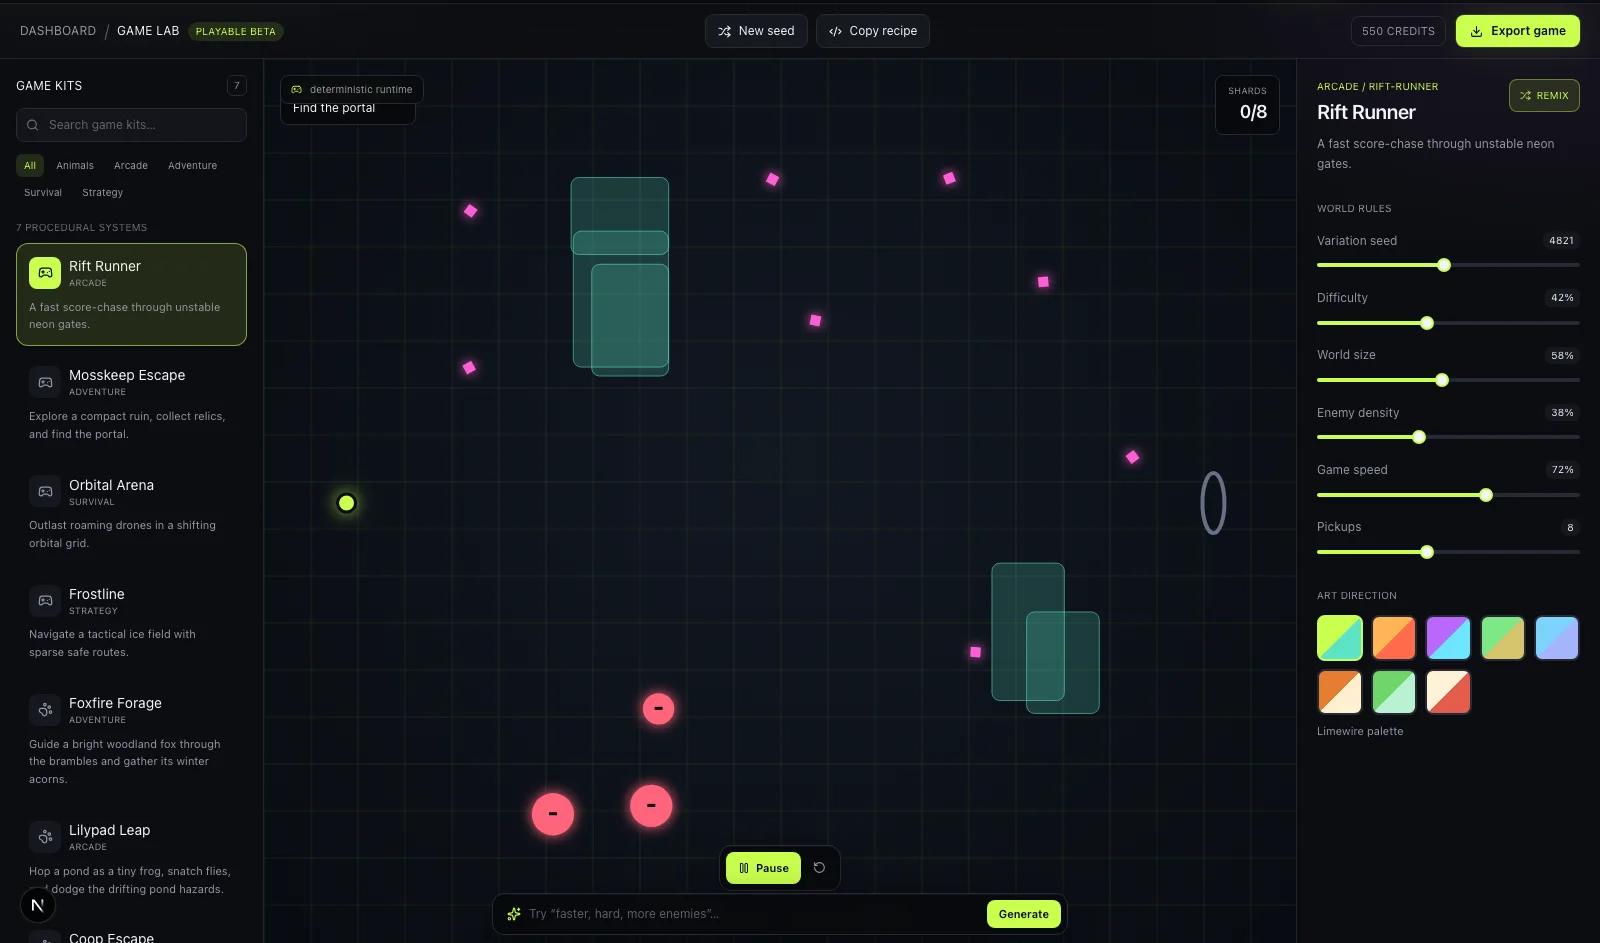 bunpav's Game Lab procedural level generator producing a playable browser game level with tunable difficulty and world-size parameters
Step 8: Wire it together and playtest
With a validated core mechanic (from Game Forge or your own prototype) and a first asset pass (from Primitive Lab, text/image-to-3D, and Audio Lab), assemble the full pipeline:
OSM road data ─┐
                ├─→ Road mesh builder ─┐
DEM elevation ──┘                       ├─→ Three.js scene ─→ Client
                 AI-generated GLB assets ┘         │
                                                     ▼
                                          Socket.IO game server
                                          (position sync, races)
Playtest against the checklist below before layering on more features — a Hop.Earth-style game lives or dies on whether driving feels good on the first real region you load, not on how many regions you've pre-fetched.
Hop.Earth-style build checklist
□ Reference architecture read: github.com/DVLPLONDON/Hop
□ Fixed-region OSM extract loading correctly (start here, not live tiles)
□ Elevation sampled along road segments, not just at intersections
□ Road class (highway=motorway/residential/etc.) preserved through the pipeline
□ Socket.IO server grouping broadcasts by tile/session, not global
□ First vehicle + prop pass generated in Primitive Lab, exported as GLB
□ Engine/tire/ambience SFX generated in Audio Lab
□ Core driving mechanic validated in a fast prototype (Game Forge or your own) before scaling regions
□ Honest "what's real vs. approximated" messaging for players, per Hop.Earth's own precedent
Honest limitations worth planning around
- Live, planet-scale OSM/elevation serving is the hard 20%. Everything up to a fixed-region prototype is achievable in a weekend; real-time, any-road generation at Hop.Earth's scale is a genuinely harder infrastructure problem (caching, tile invalidation, request volume) that the public reference repo deliberately doesn't fully solve.
- Data quality varies by region. OSM coverage density and DEM resolution both depend on how much volunteer/government mapping attention a given area has received — "drive anywhere" will look and feel more complete in well-mapped regions than sparse ones.
- AI-generated assets need an art-direction pass. Primitive Lab and text/image-to-3D get you game-ready meshes fast, but a consistent visual style across dozens of generated assets still benefits from a human choosing palettes and proportions deliberately, not accepting every default.
- Game Forge and Game Lab are prototyping tools, not the production stack. Both are genuinely useful for validating mechanics fast, but neither replaces the custom OSM/elevation pipeline described in steps 1–5 if your actual goal is real-world road accuracy at scale.
- Multiplayer interest management matters early. Broadcasting every player's position to every connected client, unfiltered, will not scale past a handful of concurrent players — group by tile or session from the start, not as a later optimization.
Related on explainx.ai
- Rigging an AI Image-to-3D Character: The One Blender Step That Makes It Work — 593 disconnected shells to 4, and why bone heat only works after a weld
- Hop.Earth: A Browser Game Where You Can Drive Any Real Road on Earth
- bunpav's Procedural 3D + Game Audio Lab (Beta)
- img2threejs v1.5.1 — rigged browser characters from a photo
- Image-to-Three.js: bunpav's Procedural Photo-to-3D Pipeline
- Opus 5 Procedural Desert Explorer in Babylon.js/WebGPU
- Claude Opus 5's Top 10 Game Prompts
- Roblox Build AI: Prompt-to-Game on Mobile
- What Are Agent Skills? Complete Guide
- Claude Code + Unity MCP guide — drive a real Unity Editor with Claude Code instead of a browser engine
Official/primary sources: github.com/DVLPLONDON/Hop · bunpav.com · bunpav Browser Game Generator (Game Forge)
Repo structure, ports, and feature details reflect the public state of both the Hop.Earth reference repo and bunpav's product surface as of early August 2026. Both are actively evolving — re-check each project's own docs before treating specifics here as current.